The Art of Drawing Human Anatomy Decoded – Detailed Guides On Drawing Realistic Body Parts
Drawing human body parts is trickier and difficult for new enthusiasts who are just taking part into learning-to-draw or in the art class unless they decode it completely. Today, we are kicking off a series that would crack the code on human anatomy drawing, ditching the dusty textbook approach and injecting some real-world flair that would put us on the frontier of mastering the art. We’ll dissect the human form drawing, one key component at a time, focusing on capturing the raw beauty and diversity that makes us human and drawing body parts to perfection.
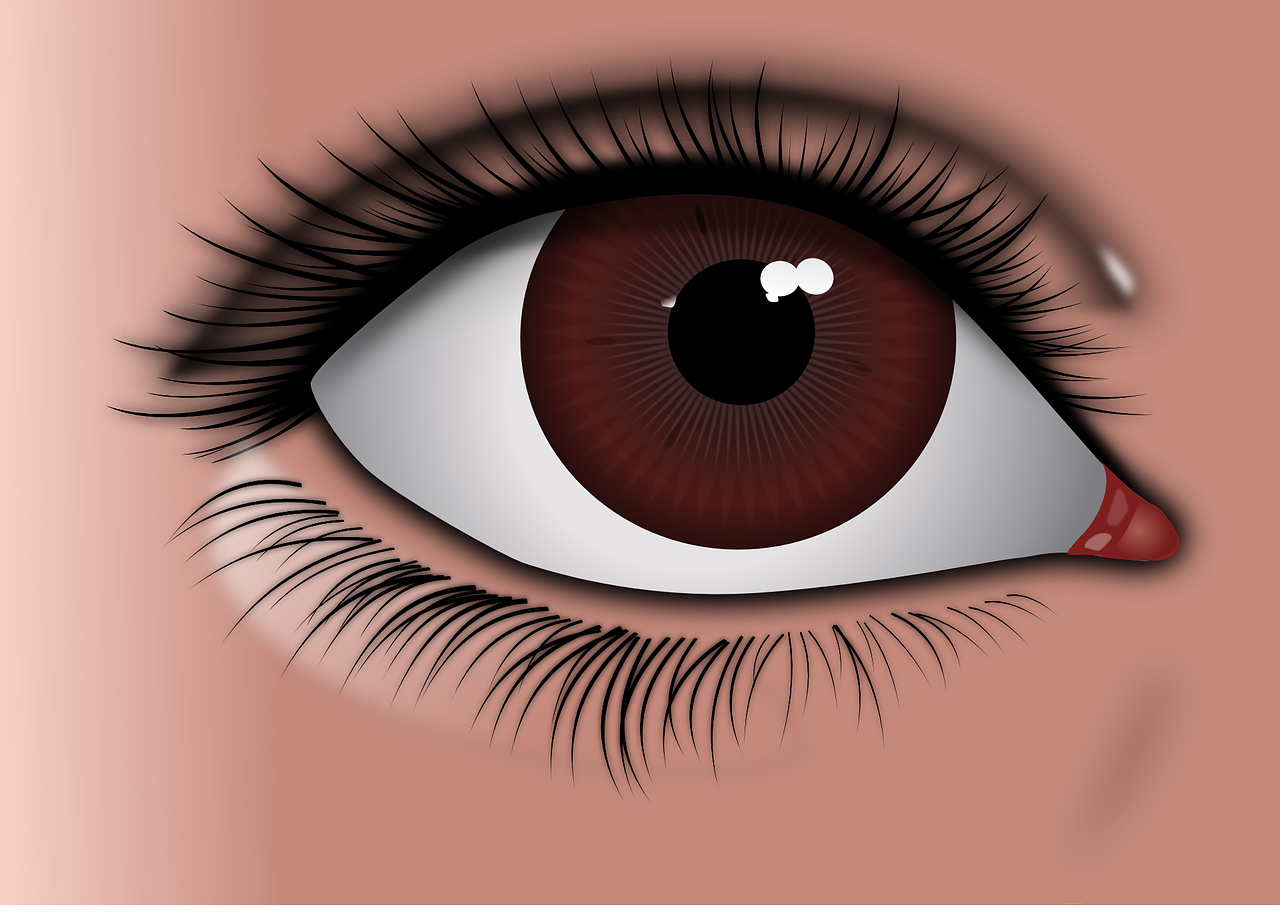
# 1 – Sketching The Eyes – Windows to the Soul
The eyes are the gateway to the soul, and drawing them realistically goes way beyond perfect circles and eyelashes. Here’s how to breathe life into those peepers

Step # I – Hacks To Draw Different Parts
- The Eyeball – Imagine the eyeball as a slightly squashed sphere. Sketch its basic form, factoring in the bulge at the front for the cornea. Don’t forget the tear duct, that tiny guardian of moisture in the corner.
- The Socket – The eyeball sits nestled within a bony socket. Lightly sketch the socket’s shape, considering the brow bone’s influence on the upper eyelid.
Step # II – Drawing Iris and Pupil
- The Iris -This colored disc is the star of the show! Research different eye colors and how they interact with light. Use a textured brush to create a realistic iris with depth, adding flecks and variations within the color.
- The Pupil -The pupil, the black dot in the center, reacts to light. Play with its size to convey emotion: a smaller pupil suggests bright light, while a larger one indicates a darker environment.
Step # III – Drawing Lashes
- Lashes – Lashes aren’t just a single line! Sketch individual lashes of varying lengths, curving them slightly to add depth. Remember, some people have naturally thicker lashes, while others have sparse ones – embrace the diversity!
- Don’t Forget the Tears – A glistening tear adds a powerful emotional touch. Use a light touch and a wet-looking brush to create a realistic tear effect.
We are continuing our exploration of the eyes, those captivating windows to the soul. Next, we would get into the final touches, adding depth, emotion, and a touch of drama
#2 Dealing Details of Drawing Intricate & Delicate Parts
I) A Touch of Emotion – Drawing The Tears
A glistening tear can add a powerful emotional punch to your drawing. Here’s how to create a realistic tear effect:

- Light Touch is Key – Tears are delicate, so use a very light touch with your pencil or brush.
- Wet Brush Magic – If using traditional media, dampen your brush slightly. This creates a softer line that mimics the reflective nature of a tear.
- Shape and Placement – Tears typically form a teardrop shape, with the pointed end closest to the tear duct.
- Highlighting the Tear – A tiny white highlight near the top of the tear, catching the light, adds realism.
#3 Consider Asymmetry Drawing Expression
Eyes are rarely perfectly symmetrical. A slight difference in size or shape can add a touch of realism and individuality to your drawing.
i) Expression Through Gaze
The direction of a person’s gaze plays a huge role in conveying emotion. Here’s how to use gaze to tell a story:
- Direct Gaze – A direct gaze creates a connection between the subject and the viewer. It can suggest confidence, curiosity, or even confrontation.
- Averted Eyes – Looking away can suggest shyness, sadness, or contemplation.
- Downward Gaze – Looking downwards can convey shyness, submission, or deep thought.
Experiment with different eye positions to create the emotional tone you desire in your artwork.
#4 Shading and Bringing Intricate Details to Life
Shading is what truly brings your eye drawing to life, creating depth and dimension.
I) Shading Techniques
- Remember the light source! Where is the light coming from in your drawing? This will determine where the highlights and shadows fall on the eye
- Use a light touch for highlights and gradually build up darker tones for shadows
- The upper eyelid casts a shadow over the eyeball. This shadow is darkest closest to the lid and gradually fades as it moves down the eyeball
- The crease of the upper eyelid can be accentuated with a slightly darker shadow. But remember, keep it subtle
- The whites of the eye are not pure white. Add a very faint shadow or a hint of the surrounding color to create a more realistic effect
Here are some additional tips for practice
- Use reference photos! There are countless online resources with photos of eyes from various angles and with different expressions.
- Start with basic shapes and gradually add details.
- Don’t be afraid to experiment! Try different techniques and styles to find what works best for you.
With dedication and practice, you’d be drawing captivating and realistic eyes that truly capture the essence of your subject. Stay tuned for the next episode, where we’ll conquer the complexities of the human mouth, exploring lips that smirk, smile, and speak volumes without uttering a word. Happy drawing!
Stay tuned for the next episode, where we’d conquer the complexities of the human mouth, exploring lips that smirk, smile, and speak volumes without uttering a word. Remember, anatomy isn’t a rigid formula; it’s the foundation for capturing the essence of a human being, their stories, and their emotions. Let’s get drawing!